

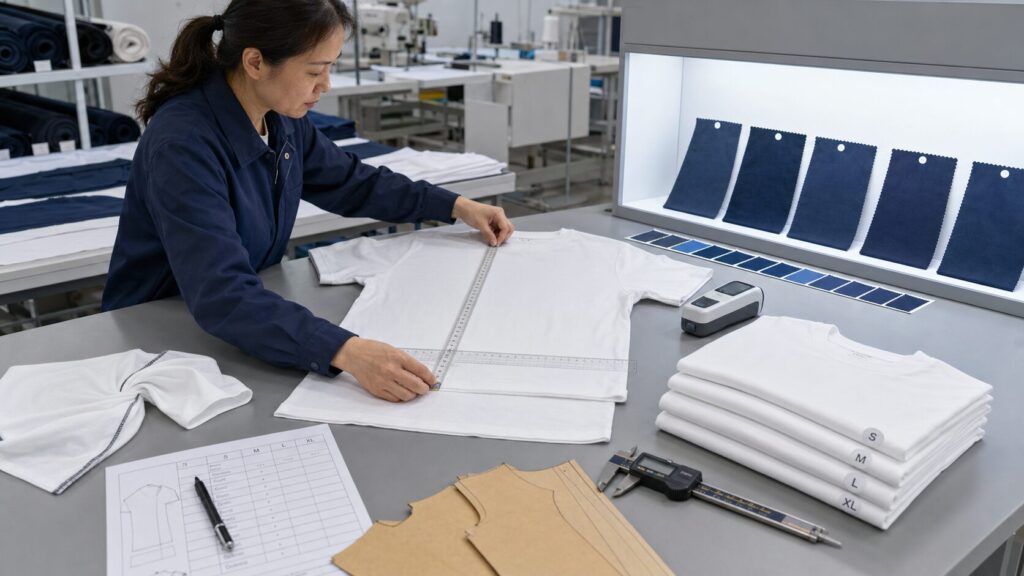
Clothing shrinkage and size inconsistency rarely come from one isolated mistake. They usually develop through a chain of small deviations involving fabric construction, dyeing, relaxation, cutting, sewing, finishing and measurement.

A T-shirt can leave the factory within the approved measurement tolerance and become too short after its first wash. Two polo shirts can carry the same color name but look different under retail lighting. Garments cut from the same pattern can still finish at different dimensions because the fabric, seam tension or pressing conditions changed.
These problems are expensive for apparel brands. They create:
- Product returns
- Negative reviews
- Size exchanges
- Customer complaints
- Inconsistent product photography
- Retail rejections
- Rework and replacement shipments
- Loss of confidence in repeat orders
Professional clothing factories do not rely on final inspection alone. Shrinkage, color and sizing must be controlled before bulk fabric is cut and monitored throughout production.
This guide explains how an OEM clothing manufacturer builds that control system—and what buyers should include in their tech packs, purchase orders and inspection standards.
Shrinkage, Color Variation and Size Inconsistency Are Different Problems
The three issues are related, but they should not be treated as one quality defect.
| Quality Problem | What the Buyer Sees | Common Root Causes |
|---|---|---|
| Shrinkage | Garment becomes shorter, narrower or distorted after washing | Fiber behavior, knitting tension, finishing, heat, relaxation and washing method |
| Color variation | Garments or panels appear to have different shades | Different dye lots, uneven dyeing, finishing variation, light-source effects and incorrect bundling |
| Size inconsistency | Garments with the same size label measure differently | Pattern errors, cutting movement, seam allowance, sewing tension, pressing and measurement method |
| Spirality | Side seams rotate after washing | Yarn torque, knitted fabric construction, finishing and cutting alignment |
| Shape distortion | Collar, sleeve, hem or body loses its intended shape | Mixed materials, uneven shrinkage, poor stabilization and excessive pressing |
A factory must first identify which mechanism is causing the visible problem. Correcting the pattern will not solve a dye-lot issue, and stricter final measurements will not prevent unstable fabric from shrinking later.
Part One: How Clothing Factories Control Garment Shrinkage
What Causes Fabric and Garment Shrinkage?
Textile fibers and fabric structures contain tension accumulated during spinning, knitting, weaving, dyeing and finishing. Washing, moisture, agitation and heat can release this tension.
The result may be:
- Lengthwise shrinkage
- Widthwise shrinkage
- Uneven dimensional change
- Fabric growth
- Seam puckering
- Collar deformation
- Sleeve twisting
- Side-seam spirality
Cotton is often associated with shrinkage, but fiber content alone does not predict the final result. Yarn construction, fabric density, knitting settings, dyeing, finishing and garment design all matter.
A loosely constructed cotton jersey may behave differently from a compact, stabilized cotton jersey of the same composition and GSM.
1. Define the Test Method Before Defining the Shrinkage Limit
A shrinkage requirement has little meaning without a test method.
The buyer and manufacturer should agree on:
- Washing temperature
- Wash cycle
- Detergent
- Drying method
- Number of cycles
- Conditioning period
- Measurement points
- Calculation method
- Pass/fail tolerance
A garment washed in cold water and line-dried may produce a different result from the same garment washed warm and tumble-dried.
ISO 6330:2021 defines domestic washing and drying procedures used for textile testing, while ISO 5077:2007 covers the determination of dimensional change after specified washing and drying procedures. ISO 3759:2011 addresses the preparation, marking and measurement of textile specimens and garments used for dimensional-change testing. Buyers should select procedures that reflect the destination market and expected consumer care conditions. ISO textile testing catalogue
2. Calculate Shrinkage Separately for Length and Width
A common dimensional-change formula is:
Dimensional Change (%) = (Measurement After Treatment − Measurement Before Treatment) ÷ Measurement Before Treatment × 100
A negative result indicates shrinkage. A positive result indicates growth.
For example, if the body length changes from 70 cm to 68.6 cm:
(68.6 − 70) ÷ 70 × 100 = −2%
The garment has experienced 2% lengthwise shrinkage.
Width should be calculated independently. A garment may shrink 2% in length while growing slightly in width because the fabric structure has relaxed in different directions.
Do not average length and width
A single average can hide an unacceptable result.
For example:
- Length: −4%
- Width: +1%
- Average: −1.5%
The average appears moderate, but a 4% reduction in body length may still damage the fit.
3. Test Fabric Before Bulk Cutting
Testing only finished garments is too late if the entire fabric lot is unstable.
Before cutting, the factory should evaluate:
- Fabric weight
- Width
- Lengthwise dimensional change
- Widthwise dimensional change
- Spirality
- Surface appearance
- Colorfastness
- Dye-lot variation
Test specimens should be traceable to the actual bulk fabric lot.
A passing result from a development sample does not automatically approve a later production lot. Changes in yarn, dyeing, finishing or machine settings can alter dimensional stability.
4. Condition and Relax the Fabric
Knitted fabrics can remain stretched after rolling, transportation and warehouse handling. If they are cut while still under tension, the panels may contract later.
Fabric relaxation allows the material to approach a more stable condition before spreading and cutting.
The required relaxation time depends on:
- Fabric type
- Roll tension
- Fiber composition
- Elastane content
- Knitted structure
- Transportation method
- Factory environment
There is no responsible universal relaxation time for every fabric. The factory should establish it through material knowledge and test results.
What buyers should verify
- Are fabric rolls opened before cutting?
- Is relaxation time recorded?
- Are rolls stored without excessive compression?
- Are stretch fabrics given additional control?
- Does the cutting room maintain stable conditions?
5. Use Pre-Shrinking and Stabilizing Processes Where Appropriate
Fabric finishing can improve dimensional stability before garment production.
Depending on the material, processes may include:
- Compaction
- Sanforization for suitable woven fabrics
- Heat setting
- Relaxation drying
- Steam treatment
- Controlled washing
- Resin or mechanical finishing
These processes are not interchangeable.
For example, heat setting can stabilize suitable synthetic or stretch materials, while mechanical compaction may reduce residual shrinkage in knitted cotton fabric.
The factory should specify what “pre-shrunk” means for the actual material. The term should not be used as a substitute for test data.
6. Compensate the Pattern Only After Fabric Behavior Is Known
Pattern compensation can account for predictable dimensional change.
Suppose an approved finished body length is 70 cm and the fabric repeatedly shows 2% lengthwise shrinkage under the agreed care test. The technical team may adjust the pre-wash pattern or production measurement so the garment approaches the target after laundering.
However, pattern compensation is safe only when shrinkage is:
- Tested
- Stable
- Repeatable
- Similar across production lots
A pattern cannot reliably compensate for fabric that shrinks 1% in one roll and 6% in another.
The first priority is to stabilize the material. Pattern adjustment is the second step.
7. Control Mixed Materials Within One Garment
A garment may contain several materials:
- Main body fabric
- Rib collar
- Rib cuffs
- Pocketing
- Interlining
- Binding
- Elastic
- Lining
- Thread
If these components shrink at different rates, the garment may distort even when the main fabric passes testing.
Common examples include:
- A collar becoming wavy because the rib and body fabric shrink differently
- A placket twisting because the interlining behaves differently
- A hem puckering because the sewing thread and fabric respond differently
- A lining pulling the outer shell
- A printed area distorting because of heat exposure
Component compatibility should be evaluated during sample development and wash testing.
8. Test Spirality, Not Only Length and Width
Knitted garments can retain their dimensions while the side seams rotate after laundering.
This is known as spirality or torque.
Spirality may be influenced by:
- Yarn twist
- Knitting direction
- Fabric structure
- Finishing
- Pattern placement
- Cutting alignment
- Washing
ISO 16322 includes methods for determining spirality after laundering in fabrics and garments. For T-shirts and other knitted products, spirality should be treated as a separate quality characteristic rather than hidden inside a general shrinkage result.
Part Two: How Clothing Factories Control Color Variation
Color Approval Begins With a Physical Standard
Color should not be approved from:
- A phone screen
- A website image
- A messaging-app photograph
- A PDF viewed on an uncalibrated monitor
Digital devices reproduce color differently. Fabric texture, gloss, fiber composition and lighting also affect appearance.
A reliable color-approval system uses a physical reference such as:
- Pantone textile color standard
- Buyer-supplied fabric swatch
- Approved laboratory dip
- Approved production swatch
- Sealed garment sample
The approved standard should be dated, identified and protected from contamination or fading.
1. Approve Laboratory Dips Before Bulk Dyeing
For custom-dyed fabric, a dyeing facility usually prepares small laboratory samples before bulk production.
The buyer may receive several alternatives, such as:
- Option A: closest instrumental match
- Option B: slightly warmer
- Option C: slightly cooler
The approval should identify the exact option rather than saying “the middle blue sample.”
A color approval record should contain:
- Project or purchase-order number
- Fabric composition
- Fabric construction
- Color code
- Laboratory-dip number
- Approval date
- Approving person
- Light source
- Comments
2. Evaluate Color Under Controlled Lighting
The same fabric can appear different under daylight, store lighting and fluorescent office lighting. This effect is often associated with metamerism.
A shade may match under one light source but separate visibly under another.
Factories and buyers should agree on the evaluation light sources relevant to the market, such as:
- Standard daylight simulation
- Retail-store lighting
- Office lighting
- Warm domestic lighting
A controlled light box provides a more consistent evaluation environment than an open office or factory window.
3. Use Instrumental and Visual Evaluation Together
A spectrophotometer can quantify the difference between a sample and an approved standard. The result is often expressed through a color-difference value such as ΔE.
However, one universal ΔE limit is not appropriate for every product.
Acceptability can depend on:
- Color family
- Fabric texture
- Fiber composition
- Surface gloss
- Print method
- Product positioning
- Buyer standard
- Measurement system
- Instrument settings
A numerical result should support—not replace—visual evaluation.
Human observers may detect an objectionable hue shift even when the total numerical difference appears small. Conversely, a textured mélange fabric may produce variable readings while remaining visually acceptable.
4. Create a Bulk Shade Band
A bulk shade band represents the actual range of shades found within a production lot.
The factory selects samples showing:
- Lightest acceptable shade
- Approved center shade
- Darkest acceptable shade
- Any rejected shade
The buyer can then approve a realistic production range rather than expecting every metre of fabric to be optically identical.
This does not mean accepting uncontrolled color variation. It creates defined boundaries for bulk inspection.
5. Separate Dye Lots During Cutting
Fabric produced in different dye batches should not be mixed casually within one garment or retail set.
Factories should identify rolls by:
- Dye lot
- Roll number
- Shade group
- Inspection status
- Purchase order
- Color
Cut panels should remain bundled according to the approved shade group.
If the front of a polo shirt comes from one shade group and the back comes from another, the difference may become obvious after sewing—even if the rolls looked similar in storage.
6. Control Panel Direction and Fabric Face
Some fabrics reflect light differently depending on cutting direction.
This is particularly relevant to:
- Velvet
- Brushed fabric
- Suede-effect fabric
- Corduroy
- Certain knits
- Fabrics with sheen
- Napped fleece
Panels cut in opposite directions can appear to be different colors.
The marker plan should maintain the required direction and clearly identify the fabric face.
7. Distinguish Shade Variation From Colorfastness
These are different quality characteristics.
Shade variation means two garments or panels begin with visibly different colors.
Colorfastness describes how the color responds to washing, rubbing, perspiration, light or other exposure.
A garment can have excellent initial shade consistency but poor wash fastness. It can also have good colorfastness while containing panels from mismatched dye lots.
Both must be evaluated.
8. Control Heat During Printing and Finishing
High-temperature processes can change the appearance of certain dyed fabrics.
Risk processes include:
- Heat transfer
- Sublimation
- Fusing
- Pressing
- Curing
- Seam sealing
Possible results include:
- Color migration
- Dye sublimation
- Gloss marks
- Scorching
- Uneven shade
- Press impressions
The factory should test the selected decoration and finishing process on the actual bulk fabric before production.
Part Three: How Clothing Factories Control Size Inconsistency
A Size Label Is Not a Measurement Standard
“Medium” has no universal dimensions.
One brand’s medium may be another brand’s small or large. Even within the same brand, an oversized T-shirt and a fitted polo require different measurement standards.
Size consistency begins with an approved measurement chart.
The tech pack should define:
- Point of measurement
- Target measurement
- Tolerance
- Measurement method
- Garment condition
- Whether measurements are pre-wash or post-wash
- Whether stretch should be relaxed
- Whether closures should be open or closed
Without a measurement method, two inspectors may produce different results from the same garment.
1. Define Clear Points of Measurement
Ambiguous measurement descriptions create avoidable variation.
For example, “chest width” should specify:
- Distance below the armhole
- Whether the garment is measured flat
- Whether seams are included
- Whether the fabric is smoothed or stretched
- Whether buttons or zippers are closed
The tech pack should include diagrams for critical measurements.
Common points include:
- Body length
- Chest width
- Shoulder width
- Sleeve length
- Sleeve opening
- Bottom opening
- Neck width
- Front neck drop
- Back neck drop
- Armhole
- Waist
- Hip
- Inseam
- Outseam
2. Set Product-Specific Tolerances
Not every measurement needs the same tolerance.
A practical tolerance system considers:
- Garment type
- Fabric stretch
- Measurement length
- Visual importance
- Functional importance
- Production method
- Size
- Market positioning
A small collar measurement may require tighter control than a long body measurement. A stretch sports top may behave differently from a structured woven shirt.
Tolerances should be agreed before sampling—not negotiated after inspection fails.
3. Approve the Base Size Before Grading
The base size establishes the garment’s fit and proportions.
The sequence should be:
- Develop the base pattern
- Produce a fit sample
- Review fit and measurements
- Correct the base pattern
- Approve the base size
- Grade the complete size range
- Produce size-set samples
- Confirm critical graded measurements
Grading an unapproved base pattern multiplies the original problem across every size.
4. Review Size-Set Samples
A medium sample does not prove that XS, 2XL or 5XL will fit correctly.
Size-set review can reveal:
- Incorrect grading increments
- Excessively large armholes
- Sleeve imbalance
- Neck openings that do not scale correctly
- Poor plus-size proportions
- Inadequate garment length
- Pocket-position errors
- Logo placement problems
Not every size must always be sampled, but the selected size set should represent important points across the range.
5. Control Fabric Spreading Tension
Fabric can stretch during spreading. If it is cut while stretched, panels may contract afterward.
The cutting team should control:
- Layer tension
- Fabric alignment
- Number of plies
- Relaxation
- Marker placement
- Fabric direction
- Slippage
- Edge distortion
Stretch fabrics and lightweight knits require particular care.
6. Verify Cut Panels Before Sewing
Pattern accuracy does not guarantee cutting accuracy.
The factory should check cut components against approved patterns or templates.
Critical panels may include:
- Front body
- Back body
- Sleeves
- Collar
- Cuffs
- Plackets
- Waistbands
- Pocket pieces
If cutting is incorrect, sewing operators cannot restore the intended dimensions reliably.
7. Maintain Bundle Control
Cut components should remain grouped by:
- Size
- Color
- Shade
- Style
- Order
- Cutting lot
Mixing panels between sizes or shades creates both measurement and appearance problems.
Bundle tickets and controlled movement through the production line help preserve traceability.
8. Control Seam Allowance and Stitch Tension
Sewing changes the effective dimensions of a garment.
Variation may result from:
- Inconsistent seam allowance
- Excessive stitch tension
- Incorrect differential feed
- Operator handling
- Stretching during sewing
- Uneven overlocking
- Incorrect machine settings
On knitted garments, poor differential-feed settings can create wavy seams or cause one layer to feed faster than another.
The factory should establish machine settings during pre-production and confirm the first finished pieces before increasing output.
9. Approve the First Production Pieces
The first finished garments from the bulk line should be checked against:
- Approved pre-production sample
- Measurement chart
- Construction details
- Artwork placement
- Color standard
- Workmanship requirements
This is often called first-piece, first-output or pilot-run approval.
Finding a measurement trend after five garments is manageable. Finding it after 5,000 garments is expensive.
10. Monitor Measurements During Production
Measurement inspection should be distributed throughout the production run.
A practical sequence includes:
- First-piece measurement
- Inline measurement
- End-of-line measurement
- Finishing measurement
- Final random measurement
- Post-wash verification where required
Inspectors should record actual values rather than marking every result simply as “pass.”
Actual measurement data can reveal movement toward the tolerance limit before the garments fail.
11. Control Pressing and Finishing
Steam and heat can temporarily or permanently change garment dimensions.
Excessive pressing can:
- Stretch body length
- Flatten fabric texture
- Create shine
- Distort collars
- Change seam appearance
- Mask shrinkage until the next wash
Garments should cool and stabilize before final measurement. Measuring immediately after aggressive steaming can produce misleading results.
12. Standardize Measurement Conditions
The garment should be measured:
- On a flat, stable surface
- Using a calibrated measuring tool
- In a defined condition
- Without uncontrolled stretching
- After an agreed conditioning period
- With closures positioned consistently
Inspectors should receive the same point-of-measurement instructions used by the sample room and buyer.
How the Three Problems Interact
Shrinkage, color variation and size inconsistency often appear together.
Consider a navy cotton polo order:
- Two dye lots are used.
- One lot receives stronger finishing.
- The lots have slightly different shrinkage.
- Panels are mixed during cutting.
- Garments initially pass measurement inspection.
- After washing, some bodies shorten more than others.
- The color difference also becomes more noticeable.
The customer reports both sizing and color inconsistency, but the root cause began in fabric-lot control.
This is why the full production history matters.
Quality Problem Diagnosis Table
| Customer Complaint | Possible Cause | Factory Investigation |
|---|---|---|
| T-shirt became shorter | Lengthwise fabric shrinkage | Review wash test, fabric lot and finishing |
| Garment became wider | Fabric relaxation or growth | Compare width before and after washing |
| Side seam twisted | Fabric spirality | Test fabric and garment torque |
| Collar became wavy | Different body and rib shrinkage | Test components separately |
| Same size fits differently | Sewing, cutting or measurement variation | Review actual measurement data by lot |
| Front and back look different | Mixed shade groups | Trace panel bundles and dye lots |
| Color changed after washing | Poor colorfastness | Review wash-fastness testing |
| Dark print stained light fabric | Dye migration or rubbing | Review ink, curing and colorfastness |
| Garment looked correct before pressing | Pressing changed dimensions | Review temperature, steam and handling |
| Largest sizes are too short | Incorrect grading rule | Review base pattern and size increments |
What Buyers Should Include in a Tech Pack
To reduce disputes, define the following before production.
Fabric specification
- Fiber composition
- Yarn specification where relevant
- Fabric structure
- Finished GSM and tolerance
- Finished width
- Surface finish
- Color reference
- Dimensional-change requirement
- Spirality requirement
- Colorfastness requirements
Measurement specification
- Point-of-measurement diagrams
- Target dimensions
- Size range
- Grading increments
- Tolerance by measurement
- Pre-wash or post-wash condition
- Measurement method
Color specification
- Physical master standard
- Approved laboratory dip
- Evaluation light source
- Acceptable shade range
- Dye-lot restrictions
- Instrumental requirement if applicable
- Approval responsibility
Testing specification
- Test method
- Wash procedure
- Drying procedure
- Number of cycles
- Sample quantity
- Test stage
- Laboratory responsibility
- Pass/fail criteria
Questions to Ask a Custom Clothing Manufacturer
Before placing an OEM order, ask:
- Do you test dimensional change on bulk fabric before cutting?
- Which washing and drying procedure will be used?
- How do you identify and separate dye lots?
- Can you provide a bulk shade band?
- How long is the fabric relaxed before cutting?
- How do you control knitted-fabric spirality?
- Will the pattern be adjusted for tested shrinkage?
- Are rib, lining and main fabric tested for compatibility?
- How are measurement methods communicated to inspectors?
- Will size-set samples be produced?
- How are first production pieces approved?
- How often are measurements checked during sewing?
- How do you control pressing temperature and steam?
- Can you provide pre-wash and post-wash reports?
- How are failed lots isolated and corrected?
A manufacturer should answer with process details and records, not merely say that the problem “will not happen.”
How LSLONG Controls Custom Apparel Consistency
Shenzhen LSLONG Garments provides OEM and ODM manufacturing for custom T-shirts, polo shirts, hoodies, sportswear, teamwear, school uniforms and corporate apparel.
For custom clothing programs, quality planning can include:
- Fabric specification review
- Physical color approval
- Laboratory-dip confirmation
- Bulk fabric inspection
- Fabric relaxation
- Shrinkage testing
- Pattern development
- Size grading
- Pre-production sampling
- First-piece confirmation
- Inline measurement inspection
- Shade and dye-lot control
- Print and embroidery inspection
- Final measurement checks
- Packaging verification
The exact testing method and tolerance should be agreed for each project. A lightweight cotton T-shirt, polyester sports jersey and formal school blazer should not share one generic quality standard.
LSLONG works with buyers to convert product requirements into measurable fabric, color, sizing and workmanship specifications before bulk production.
Recommended OEM Approval Process
A controlled order should follow this sequence:
1. Product specification review
Confirm materials, measurements, colors, testing and intended care conditions.
2. Fabric and color development
Approve fabric quality, GSM, finish and physical color sample.
3. Prototype sample
Evaluate construction and general appearance.
4. Fit sample
Confirm the base pattern and points of measurement.
5. Wash testing
Measure dimensional change, appearance and spirality.
6. Size-set approval
Verify grading across the selected size range.
7. Pre-production sample
Approve the intended bulk materials, decoration and packaging.
8. Bulk fabric inspection
Confirm the actual production lot before cutting.
9. First-piece approval
Check the first garments from the production line.
10. Inline and final inspection
Monitor actual data throughout production and verify finished goods before shipment.
Final Thoughts: Consistency Must Be Engineered Before Production
Clothing shrinkage, color variation and size inconsistency cannot be controlled by inspecting cartons at the end of production.
Reliable consistency begins with:
- Stable materials
- Defined testing procedures
- Physical color standards
- Controlled dye lots
- Fabric relaxation
- Accurate patterns
- Clear measurement methods
- First-piece approval
- Recorded inline inspections
- Traceable corrective action
The goal is not to claim that textiles never move or vary. Textile materials naturally respond to moisture, heat, tension and handling. The factory’s job is to understand that behavior, define acceptable limits and keep production within the approved range.
If you are developing a private label apparel collection, corporate uniform program, school uniform range or custom sportswear product, send LSLONG your tech pack, fabric requirements, size chart and target market.
The LSLONG technical team can review the project and develop a quality-control plan for fabric stability, color matching and size consistency before bulk manufacturing begins.
Contact LSLONG for Consistent Custom Apparel OEM Manufacturing.
Frequently Asked Questions
Why do clothes shrink after washing?
Clothing can shrink when moisture, heat and agitation release tension introduced during spinning, knitting, weaving, dyeing or finishing. Fiber type, fabric construction and drying method all affect the result.
What is an acceptable garment shrinkage percentage?
There is no universal percentage for every garment. The acceptable limit depends on product type, fabric, care instructions, fit requirements and buyer standards. The test method and limit must be agreed together.
How is garment shrinkage calculated?
Subtract the original measurement from the post-treatment measurement, divide by the original measurement and multiply by 100. A negative result indicates shrinkage.
What causes color variation between garments?
Common causes include different dye lots, uneven dyeing, fabric-finishing variation, mixed shade groups, different cutting directions and lighting conditions.
What is a bulk shade band?
A bulk shade band is a set of fabric samples representing the lightest, center and darkest acceptable shades within a production lot.
Why can two garments with the same size label fit differently?
Possible causes include fabric variation, cutting movement, seam allowance, stitch tension, pressing, incorrect grading and inconsistent measurement methods.
Can pattern adjustment eliminate shrinkage?
Pattern compensation can account for stable and predictable dimensional change. It cannot reliably correct fabric with inconsistent shrinkage between rolls or dye lots.
Why should garments be measured after cooling?
Steam and pressing can temporarily stretch or contract fabric. Allowing the garment to stabilize produces a more reliable final measurement.
Does pre-shrunk fabric mean zero shrinkage?
No. Pre-shrinking reduces residual dimensional change but does not guarantee that a garment will never change. The actual performance should be confirmed through testing.
How does LSLONG control color and size consistency?
Depending on the project, LSLONG can use physical color approval, fabric-lot inspection, shrinkage testing, pattern and grading control, first-piece approval, inline measurement checks and final inspection.